USB Cables
The USB cable you choose can make a big difference in what you see when using your HackRF and especially when using it around between 120 and 480 MHz where USB is doing all its work.
Use a shielded USB cable. The best way to guarantee RF interference from USB is to use an unshielded cable. You can test that your cable is shielded by using a continuity tester to verify that the shield on one connector has continuity to the shield on the connector at the other end of the cable.
Use a short USB cable. Trying anything larger than a 6ft cable may yield poor results. The longer the cable, the more loss you can expect and when making this post a 15ft cable was tried and the result was the HackRF would only power up half way.
For best results, select a cable with a ferrite core. These cables are usually advertised to be noise reducing and are recognizable from the plastic block towards one end.
Screenshot before and after changing to a noise reducing cable (view full size image):
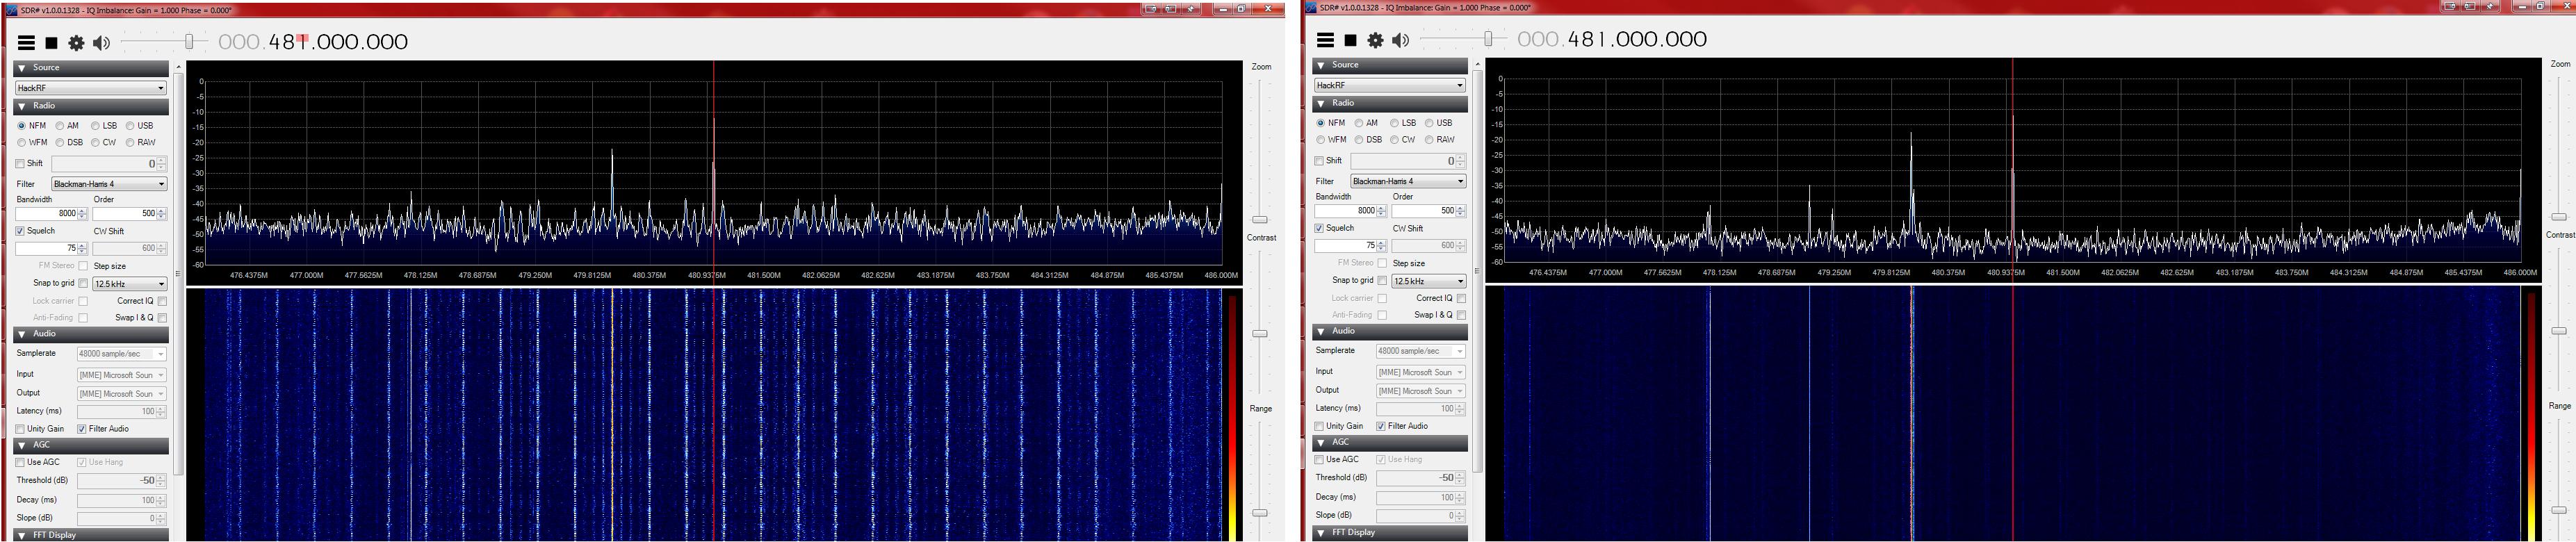
A shielded cable with ferrite core was used in the right-hand image.
The before and after images were both taken with the preamp on and the LNA and VGA both set to 24db.
Why isn’t my HackRF detectable after I plug it into my computer?
If your HackRF isn’t immediately detectable it is very possible that your USB cable is not meeting HackRF’s requirements. HackRF requires quite a bit of supply current and solid USB 2.0 high speed communications to operate. It is common for HackRF to reveal cables with deficiencies such as carrying power but not data, carrying data but not enough power, etc. Please try multiple cables to resolve this issue. More than once people have gotten their HackRF to work after trying their fifth cable.